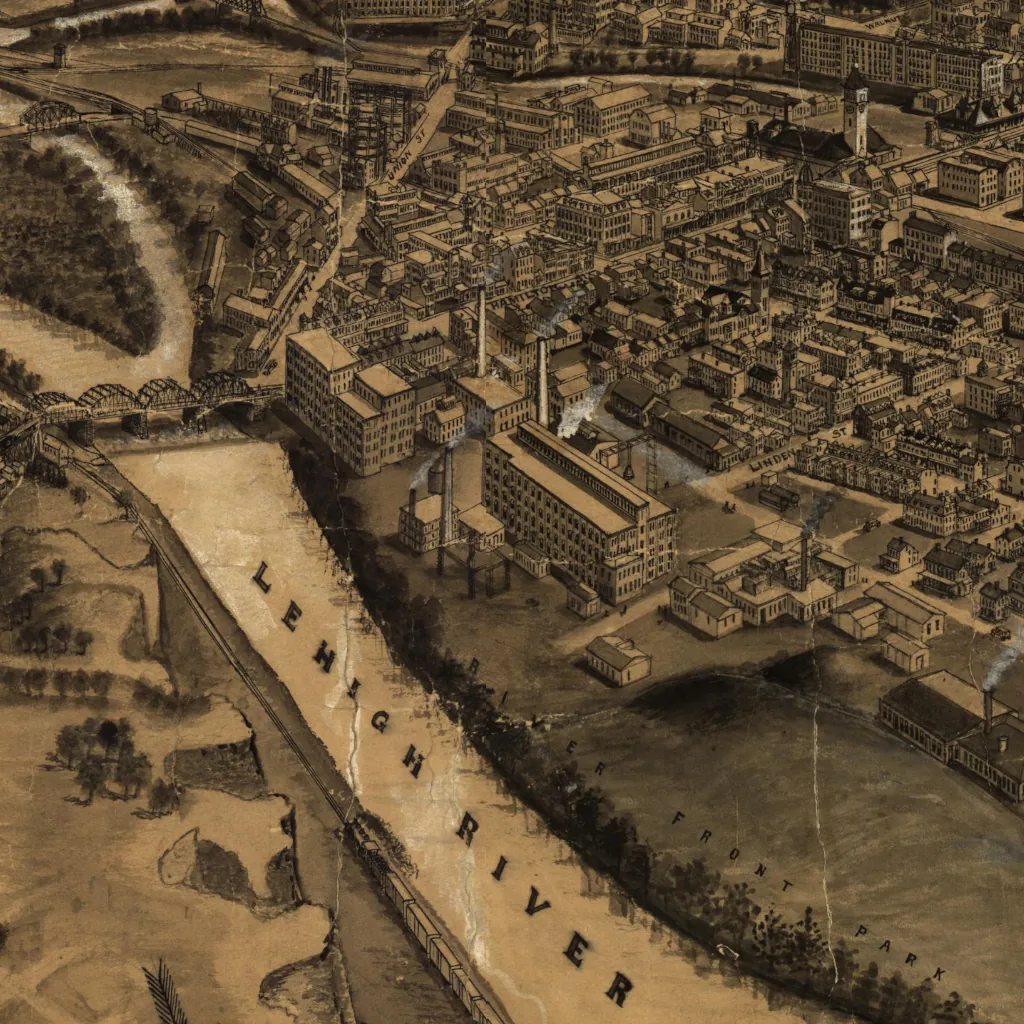
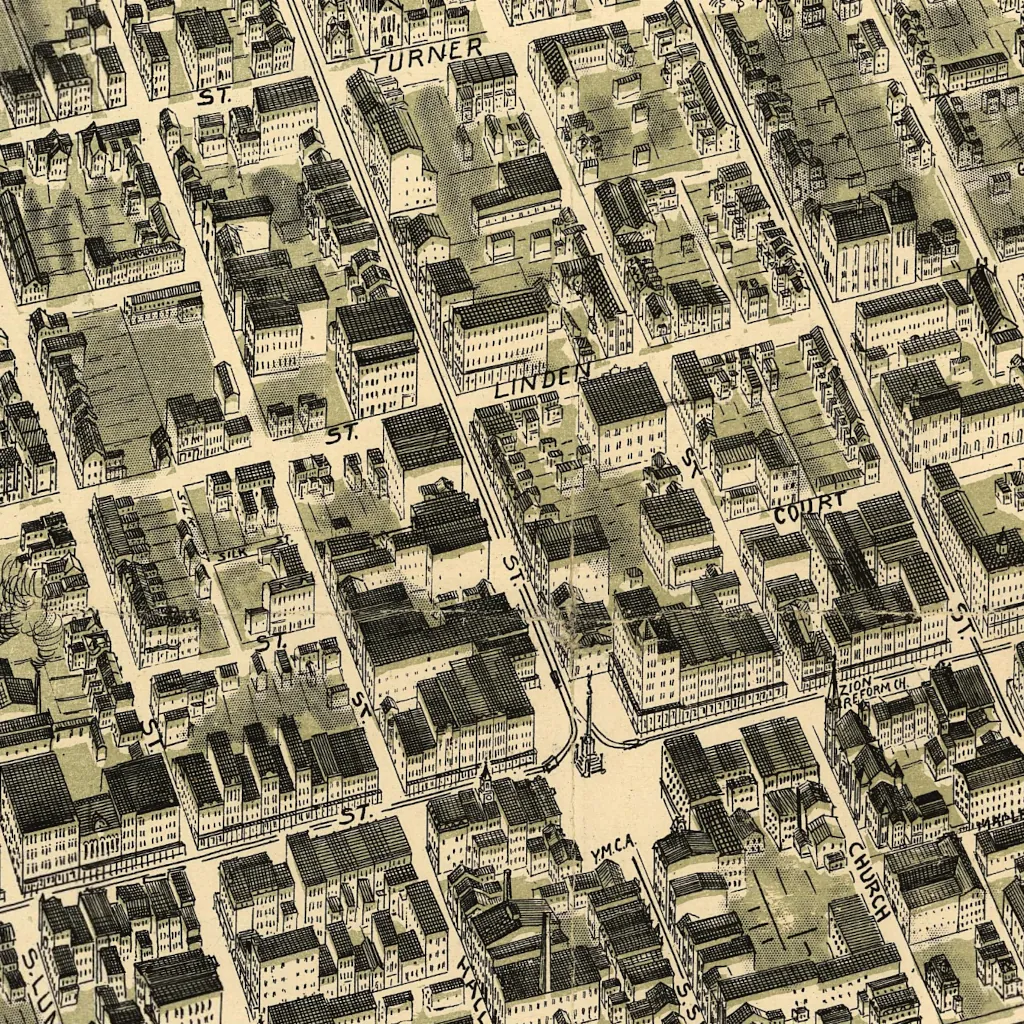
Author: mblum6180_l6d6qy
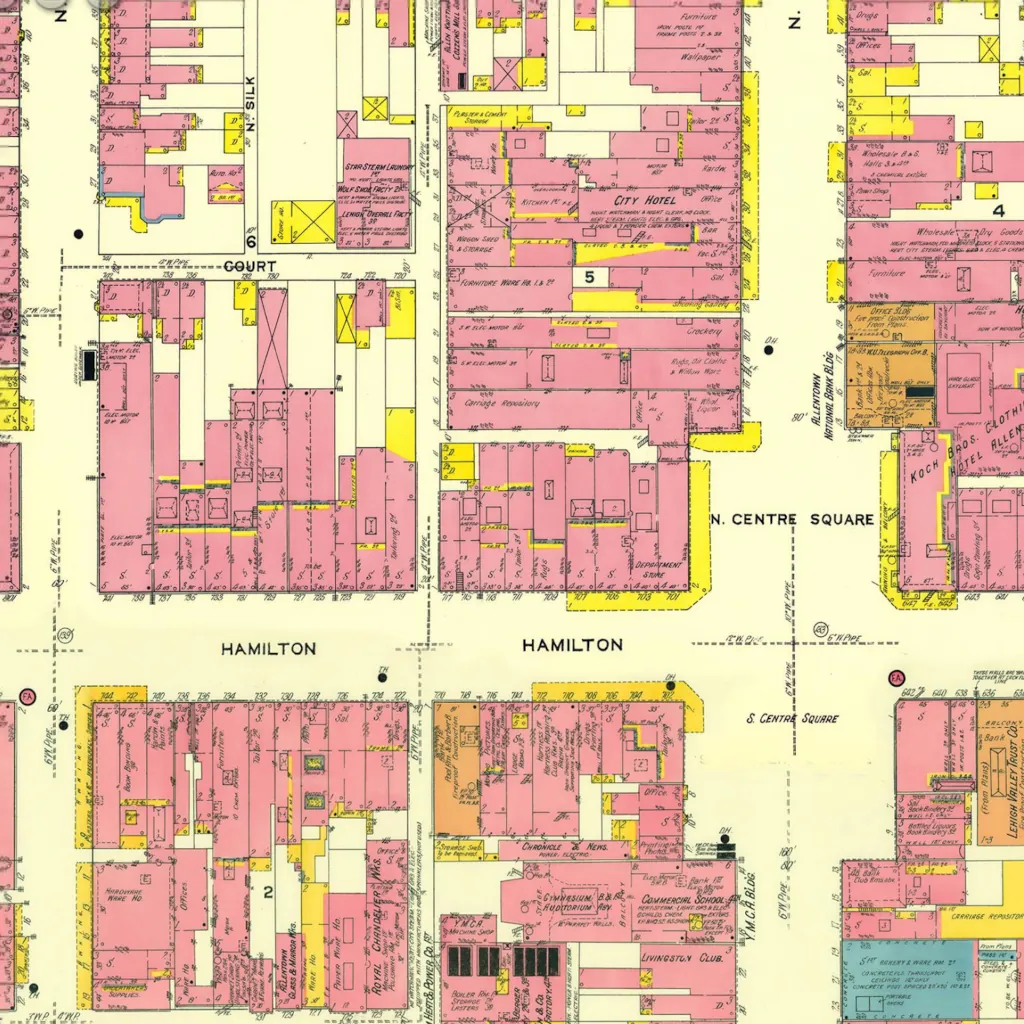
  • Step-by-Step Guide to Installing Microsoft Network Client 3.0 on an XT Computer

    To configure an XT class PC with Microsoft Network Client 3.0.
    Credit to luvit from the pre32.com forum for this info.

    Start the Microsoft Network Client 3.0 installation. When prompted for the OEM driver diskette, use Disk 2.

    Select the Microsoft TCP/IP protocol during the setup process. Go back to this option and click on Change Settings for further adjustments.

    In the Microsoft TCP/IP protocol settings, change Disable Automatic Configuration from 0 to 1. Manually enter the IP Address, IP Subnet Mask, Default Gateway0, and Gateway1 for a fixed IP setup. It’s important to save these configurations as DHCP will be disabled.

    Add another protocol by choosing Add Protocol, then select NWLink IPX Compatible Transport. Keep the default settings for this as your secondary protocol. This step is essential for 8088-based systems running Microsoft Network Client 3.0 to prevent the Net Start command from freezing. The IPX protocol is preferred over NETBEUI due to its lower memory requirement (1.4K vs. 38K). This addition is not necessary for machines with a 286 or more advanced CPU.

    Following a system reboot, you may see error messages related to the absence of a 286 processor, particularly from the TCPDRV.DOS and TCPTSR.EXE files.

    To resolve this, download and replace the existing TCPDRV.DOS and TCPTSR.EXE files with the versions sourced from the Microsoft LAN Manager 2.2c Installation Disk, available here. Note that this specific version of TCPTSR.EXE is intended for Lan Manager and will not support DHCP with Network Client 3.0 due to compatibility issues. While there might be potential fixes involving advanced DHCP server configurations, delving into such solutions is not advised here.
    https://www.mblum6180.com/wp-content/uploads/2024/03/XTNET.zip

  • Bethlehem 1904

    Bethlehem 1904

  • Install OS/2 on a 486DX2 66 Laptop with 8MB RAM and 8GB HDD

    Install OS/2 on a 486DX2 66 Laptop with 8MB RAM and 8GB HDD

    Required Software:

    • Partition Magic 3
    • OS/2 3.0 CD-ROM Version
    • Ontrack Disk Manager 9.57
    • CardSoft 3.1

    Installation Steps:

    Step 1: Setting Up Ontrack Disk Manager

        • Install Ontrack Disk Manager 9.57.
        • Use this tool to set up a DOS partition. This step is critical as it prepares your HDD for the drive overlay, which is crucial for the older BIOS to recognize and utilize the full 8GB capacity.

    Step 2: Installing CardSoft for PCMCIA Access

        • Install CardSoft 3.1.
        • This software is necessary for your laptop to access the PCMCIA CF card, which is your medium for transferring OS/2 installation files to the laptop.

    Step 3: Hard Drive Partitioning with Partition Magic

        • Run Partition Magic 3.
        • You need to create a specific partition structure:
          • A Boot Manager partition, allowing you to manage multiple operating systems.
          • A primary partition dedicated to OS/2.
          • An extended DOS partition, which will be used for transferring OS/2 installation files.

    Step 4: Transferring OS/2 Files

        • Copy all necessary OS/2 installation files to the extended DOS partition.
        • These files are generally found in the ‘os2’ directory within the ‘diskimg’ directory on the OS/2 installation CD.

    Step 5: Creating OS/2 Installation Disks

        • Use the ‘makedsks.bat’ file from the OS/2 CD to create the first two installation disks.
        • These disks are essential for booting and initiating the OS/2 installation process.

    Step 6: Modifying Config.sys on Installation Disk 1

        • Edit the ‘config.sys’ file on the first OS/2 installation disk.
        • Modify the line to: SET OS2SHELL = SYSINIT2 d:\os2. Replace d:\os2 with the actual path where you copied the OS/2 installation files.

    Step 7: Replacing Critical Files on Installation Disk 1

        • Replace IBM1S506.ADD and OS2DASD.DMD on Disk 1 with the versions from the Ontrack disk. This step is crucial for system compatibility.
        • Note: Avoid using the copyfromfloppy=1 option, as it has been known to cause system hangs.

    Step 8: Booting and Installing OS/2

        • Boot your laptop using the installation disks.
        • Follow the prompts to install OS/2 on the primary partition created earlier. Ensure this partition is set as active in the boot manager.

    Step 9: Finalizing Installation

      • Once OS/2 is installed, replace IBM1S506.ADD and OS2DASD.DMD in the C:\os2\boot directory on your HDD. This step ensures that the OS boots correctly with your hardware configuration.